The Basics
This page will help you get up and running with Swoop. It covers all the basics of adding Swoop to your website and authenticating users via OAuth.
Websites can implement Swoop with the 5 steps below.
If you haven't done so already, create a new property on the Swoop Dashboard before continuing.
Step 1: Generating the Swoop Login Link
The first step is to send the user to authorize with Swoop. Many third-party libraries can generate this link for you, however it's pretty straightforward to generate this link yourself.
https://auth.swoop.email/oauth2/authorize?response_type=code&redirect_uri=REDIRECT_URI&state=&scope=email&client_id=CLIENT_ID
Here is a brief description of each of the parameters.
| Variable | Value | Description |
|---|---|---|
| client_id | CLIENT_ID | This is the Swoop Client ID that was generated when you created the property in the Swoop Dashboard. |
| redirect_url | REDIRECT_URL | This is the URL that the Swoop API will redirect to once it has granted an authorization code. The value you pass can be customized depending on how you handle requests from the Swoop API on your backend. However, a common OAuth pattern for handling these requests is to have your REDIRECT URL match '[homepage_url]/auth/:provider/callback'. In this case, the 'provider' is 'swoop', so this would make your REDIRECT URL '[HOMEPAGE URL]/auth/swoop/callback'. |
| scope | email or OpenID | Swoop only allows sharing the user's email via OAuth. This tells Swoop that the calling application is requesting the user's email. |
| state (optional) | login/register/etc... | This can be any value you want to pass Swoop. Once the Access Token has been granted, the value of this variable will be passed back to your application. |
| response_type | code | Specifies that your application is requesting an authorization code grant. |
Step 2: The User Authenticates With Swoop
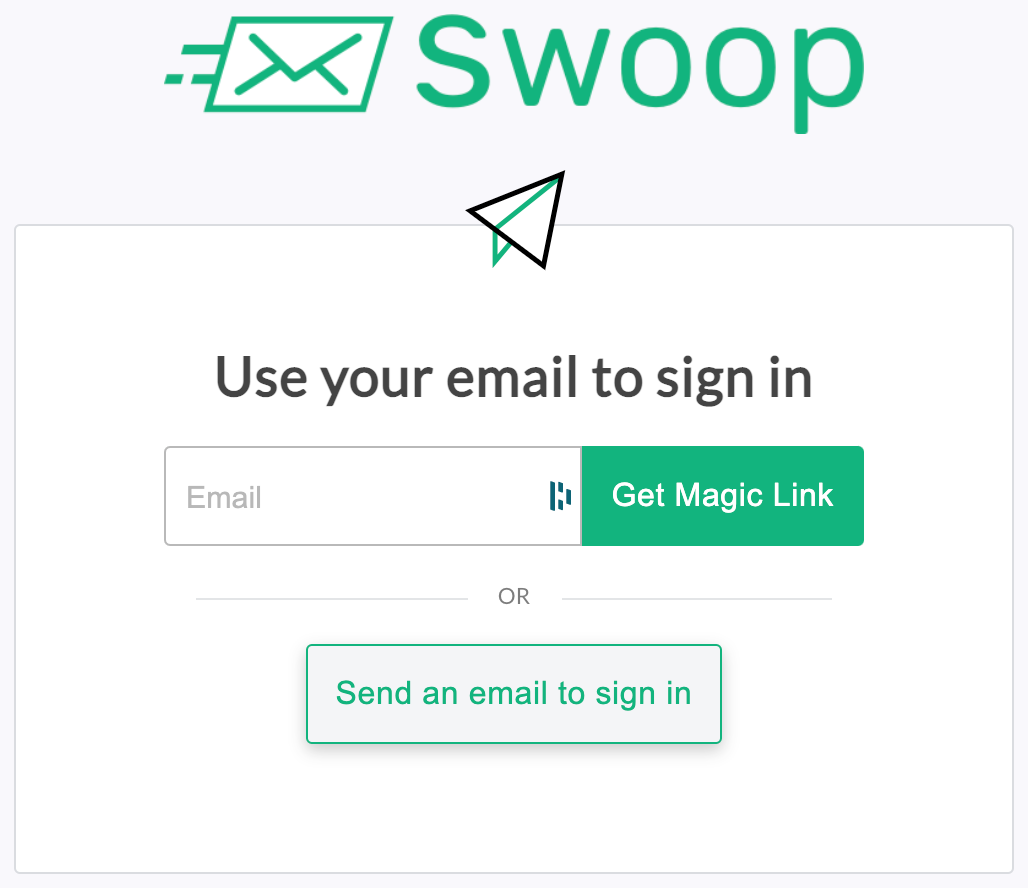
Once you send the user to the Swoop service, they can authenticate in one of two ways. Either by sending a Magic Message or by receiving a Magic Link. If the user has authenticated with Swoop before, they are able to use the 1-Click Connect to bypass email verification.

Use your email to sign in.
Step 3: Your Application Receives an Authorization Code
Once the user authenticates with Swoop, we will redirect the browser to the REDIRECT_URL that you passed in on the URL. The URL will contain a parameter named code in the query parameters. An example URL might look like this:
https://myuserapp.com/callback?code=AUTHORIZATION_CODE
Step 4: Your Application Requests an Access Token
Once the user redirects to your application's REDIRECT_URL, your application must make a POST request to Swoop with the code along with your property's secret to obtain the access token.
curl --header "Content-Type: application/json" \
     --request POST \
     --data '{"redirect_uri":"REDIRECT_URI","code":"718xzc4k87fqcl7", "client_id" : "CLIENT_ID", "client_secret": "CLIENT_SECRET"}' \
     https://auth.swoop.email/oauth2/token
One thing to ensure here is to send the same *REDIRECT_URI that you have registered in your Swoop Dashboard. Otherwise, the request will fail.
Here is an overview of the parameters in the JSON that you will send to Swoop
| Variable | Value | Description |
|---|---|---|
| code | This is the authorization code from Swoop associated with the user trying to authenticate. | |
| client_id | CLIENT_ID | This is the Swoop Client ID that was generated when you created the property in the Swoop Dashboard |
| client_secret | CLIENT_SECRET | This is the Swoop Client Secret that was generated when you created the property in the Swoop Dashboard. It should be kept in a safe place, such as an environment variable. |
| redirect_url | REDIRECT_URL | This is the URL that the Swoop API will redirect to once it has granted an authorization code. The value you pass can be customized depending on how you handle requests from the Swoop API on your backend. However, a common OAuth pattern for handling these requests is to have your REDIRECT URL match '[homepage_url]/auth/:provider/callback'. In this case, the 'provider' is 'swoop', so this would make your REDIRECT URL '[HOMEPAGE URL]/auth/swoop/callback'. |
Step 5: Your Application Receives an Access/Identity Token
Swoop will return a response containing a JWT access/identify token for your user. Here is a sample response.
{
  access_token: 'eyJhbGciOiJSUzI1NiIsInR5cCI6IkpXVCIsImtpZCI6InN3b29wIn0.eyJzdWIiOiI1ZTFmNzk1YTYxMzgxYzJhZDcwYTg3MjciLCJpYXQiOjE1ODUyNTU1MzUsImV4cCI6MTU4NTI1NTUzNn0.JlqMw3h4nH5mOJUmFNxIW2lxdUDbH0bzw5kmv1zxISFUAYEapzp6SrkY_7szBTQ_pHE6oEuIFKfmJ6KDPFFULiQOczhDIUdGKz_aRUL91_sMJUHPZ90m5dTksh7pGx0mE6lFlCSwahbAJ1UsT5X29gjtIC8GMPPt2HA8vBL0gVLM3MY5SX91A9MJFQeMNob95Z5QSO2ElYpBkA7NBqrSVvO40TiYzpYxFNuAJnCh-sBlwBWSGz3ddN_bdb3FeILMngzy0knc205JCa15P1FJmimlFe6JDijo29RsyijBzmQZ0ZaVRH-GuUojhLPs4JPj9K25ouOr2pU5-UTk_1kNYg',
  id_token: 'eyJhbGciOiJSUzI1NiIsInR5cCI6IkpXVCIsImtpZCI6InN3b29wIn0.eyJpc3MiOiJodHRwczovL2F1dGguc3dvb3AuZW1haWwiLCJzdWIiOiI1ZTFmNzk1NjYxM2ExYzJhZDcwYTg3MjgiLCJhdWQiOiJzd29vcF9wZGtocTRrODdnZDc1cCIsIm5vbmNlIjoiU19sc3ZzYTg5c2ciLCJlbWFpbCI6ImRlbW9Ac3dvb3AuZW1haWwiLCJpYXQiOjE1ODUyNTU1MzUsImV4cCI6MTU4NjExOTUzNX0.d9_qKkHzDQs6YYYwz4YFN8gpvQebuFhkfm1zLIuYlzqmk85tUD0YGUskinWaSsjiB53r8DhTBb9iKAVc969xcVdDOD7BBGTtm2NJhgq0WVRF5Xj4YjlsYOAIbPxA8IUYa5NWKzWSfw4r-oen9LxvTE4T4BPBdm_XxGfUpO_r-cX4APqhaplwhGmS9wfd-mqelWW3CkWItqReNLOudEHDHuxQVm2gYzbx-bw9CAu_PUxXvpR4y_SjfW9YtPOAtOkY2O5sOq0ItTsPxvHLoQ8GfjDXMARqGSMff4u2LHOoKzlNxW_fOkkEKPh5upchvtmfMvptnS-u-SAyKR5GwUqvXQ',
  refresh_token: 'eyJhbGciOiJSUzI1NiIsInR5cCI6IkpXVCIsImtpZCI6InN3b29wIn0.eyJzdWIiOiI1ZTFmNzk1MTYxMzgyYzJhZDcwYTg3MjkiLCJpYXQiOjE1ODUyNTU2NTYsImV4cCI6MTU4NTI1NTY1N30.ls6Hcsii2IxZ91uZGVKpTvb1V7EMv720-K6VTg3yscojyNX0U_Idl7g1UJMOvTBI45rWNt5TTi4WgJ075Fc_B_qlfemqyqp6cYFFA4vQa4u9v7FoYfuB55e4nKrrX-Da-ZjAXGEMCxGSqxzfL6wt6S0czWOA16TAaoqbIWUW92eg2wEOslg7UFt0DoQ9xm1F7GY93fueXb5x_jJgSgtCMe9BqVyUArxyat0fRJS--j3_xK_PX27ancUR-x9KMKBjRw1WOCaA9T5VcwF16wBkPEqadtAIS4sCeBfXTdneCTFdaGEe2EOZpBNWcym-_6ZIKhPooG1Fub9yaBNWIRZQ5A'
  token_type: 'bearer',
  expires_in: 3600
}
The JWT can be parsed by a number of libraries on every platform available. You can see the contents of the JWT above by clicking here
It contains a few fields that can be extracted and used to create a session for your user.
{
  "iss": "https://auth.swoop.email",
  "sub": "5e1f7956613a1c2ad70a8728",
  "aud": "swoop_pdkhq4k87gd75p",
  "nonce": "S_lsvsa89sg",
  "email": "[email protected]",
  "iat": 1585255535,
  "exp": 1586119535
}
We are primarily interested in sub (subscriber id) and email. You should associate both of these values with your users in your data model.
Updated almost 5 years ago
Now that you get the gist of getting started, check out the Swoop dashboard.
