Send An Email To Authenticate (Magic Message)
Sending an email to authenticate, also known as Magic Message, reduces the number of steps your user needs to complete, and it eliminates the need for typing. That's a win for anyone authenticating on mobile.
1. Mobile Experience
Users start their Swoop authentication journey when they Swoop In by clicking the "Swoop In with email" button on your web property or application.
The "Swoop In with email button" is typically located where a property would place their login/register button within their own website or application. An example can be found here.
Swoop In with email Password free authentication
After clicking the Swoop In with email button, the user is brought to the Swoop In authentication landing page. From here, users will click Send an email to sign in.
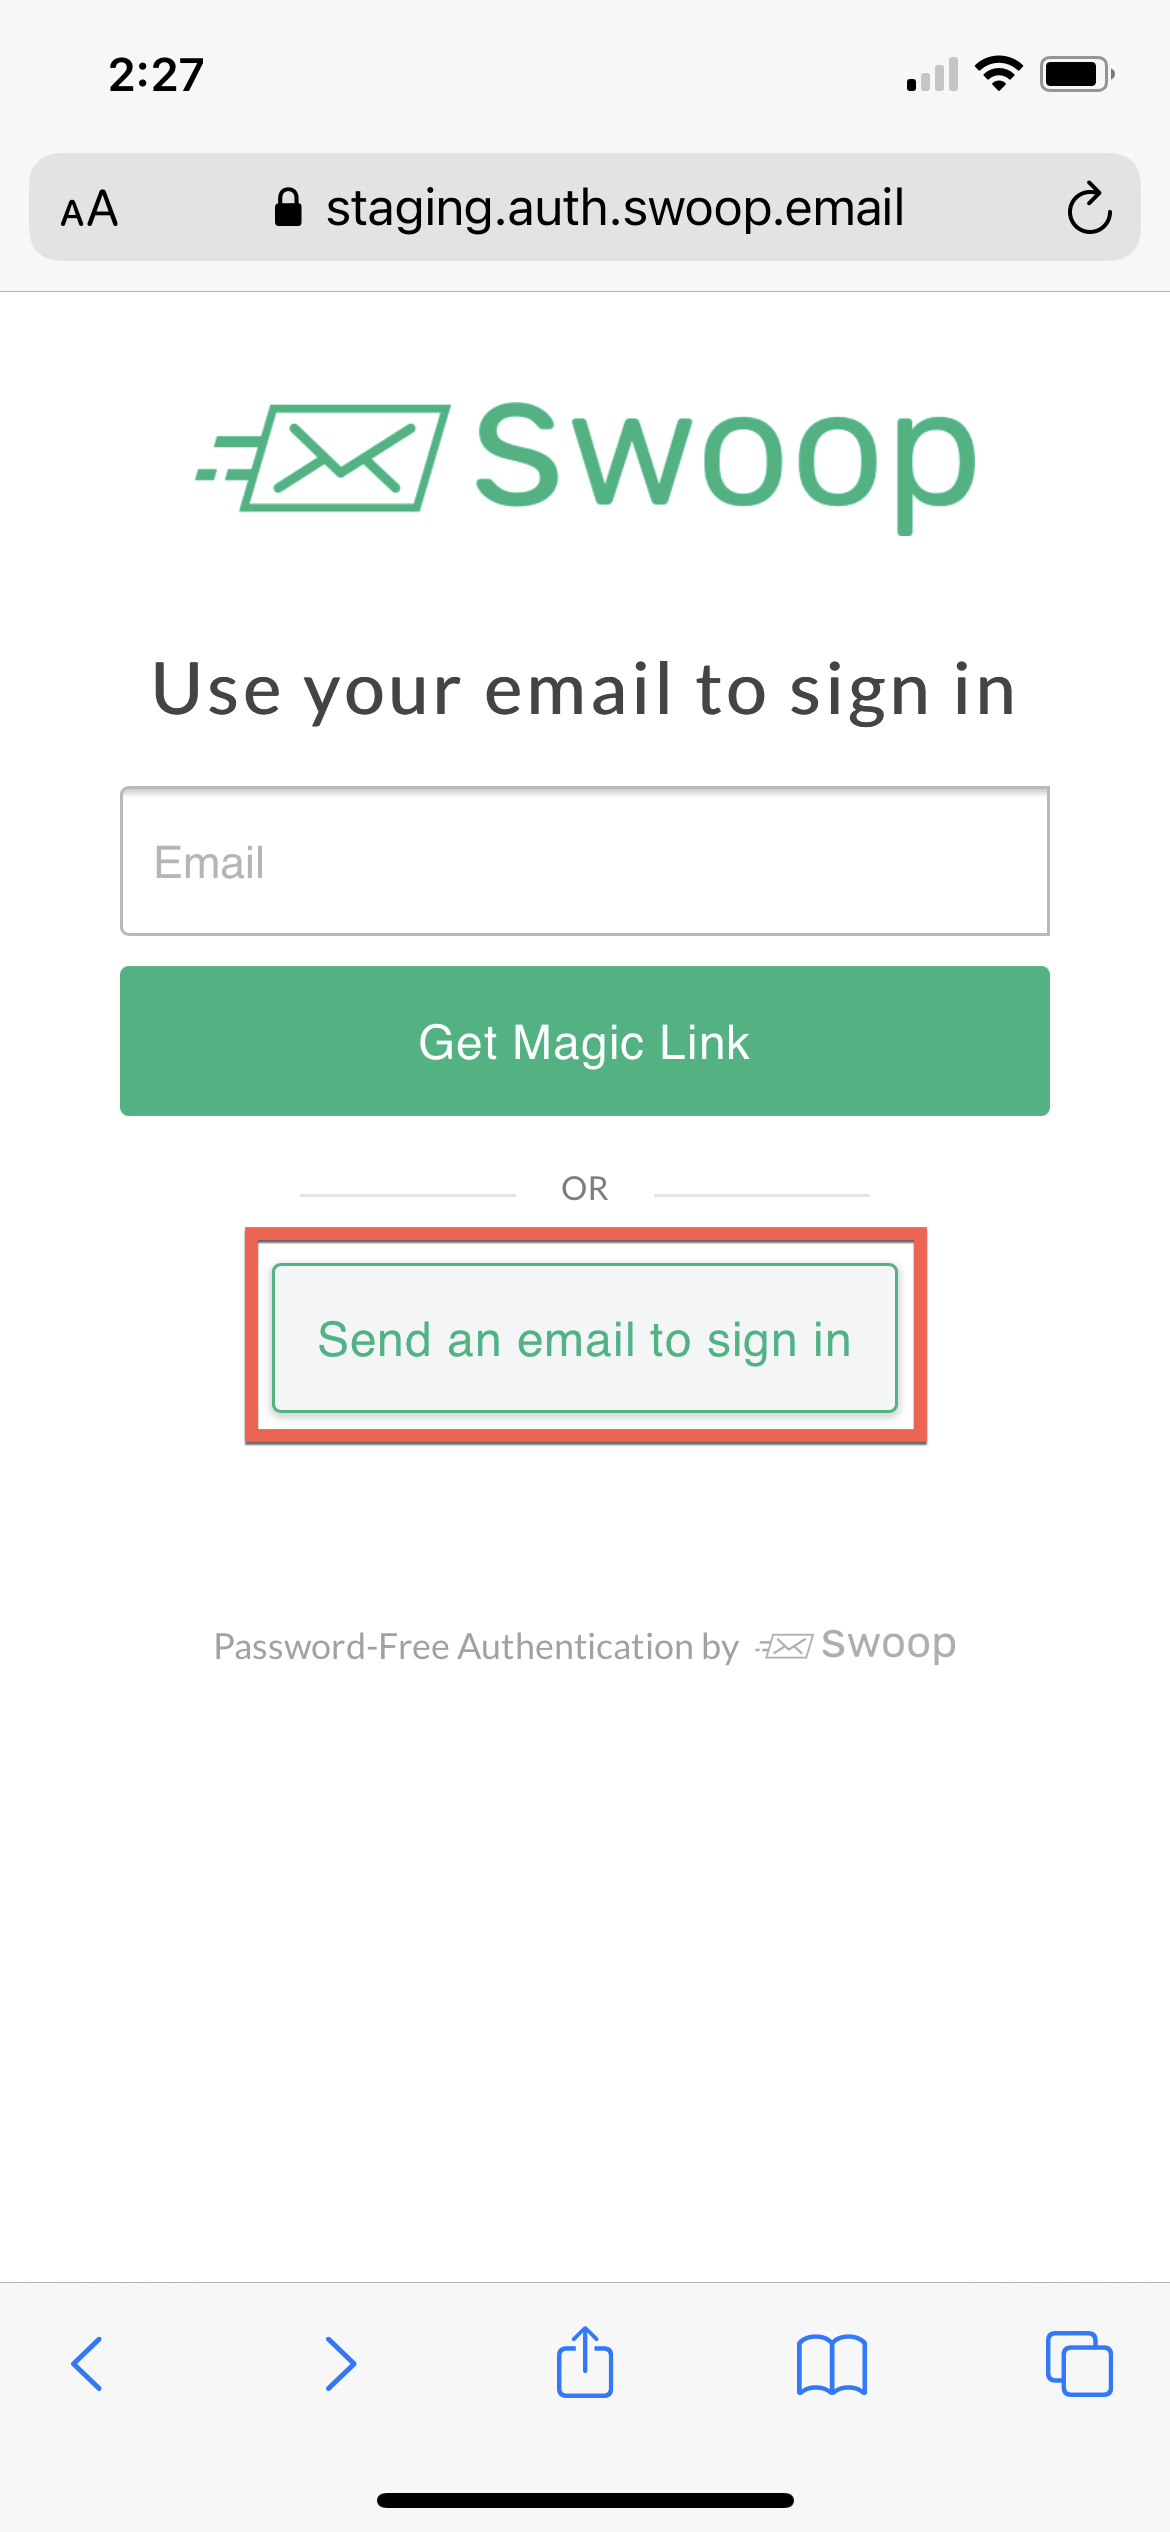
Step 1 - Send an email to login
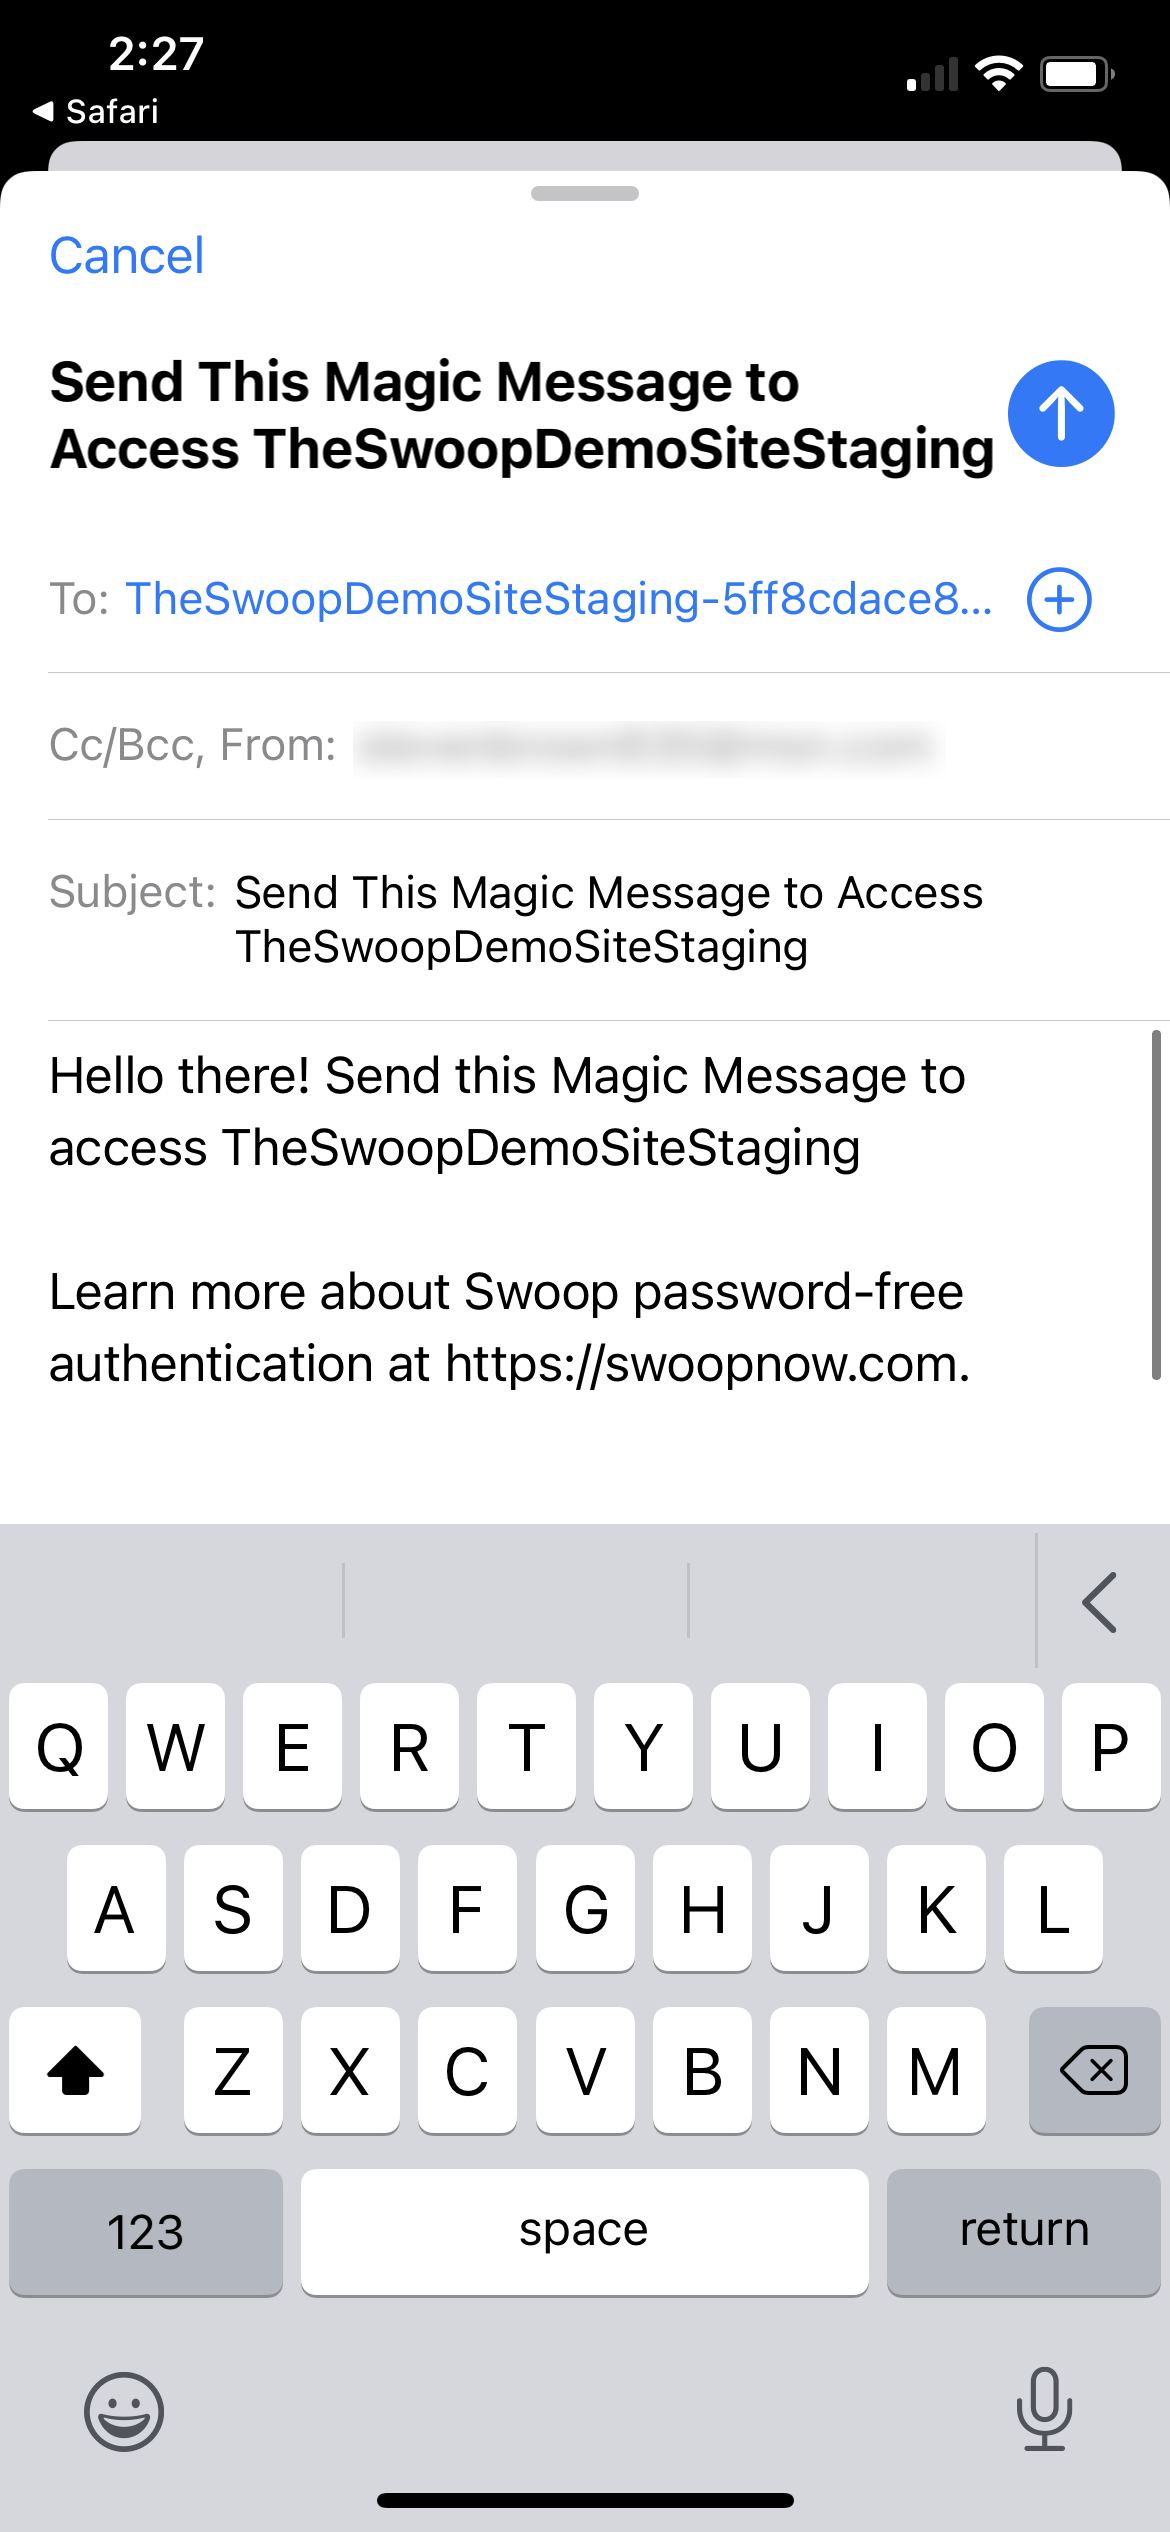
Step 2 - Send an email to login
There's no need to type. Simply click the "Send" button, return to the original browser tab and let the magic happen.
After this initial authentication, users will be able to use the 1-Click Connect for subsequent visits.
2. Desktop Experience
Swoop offers a slightly different experience on desktop as a result of some of the limitations and variations in the way that operating systems, web and mail clients treat the mailto.
When sending an email to authenticate on desktop, a user starts the process by clicking send an email to login.
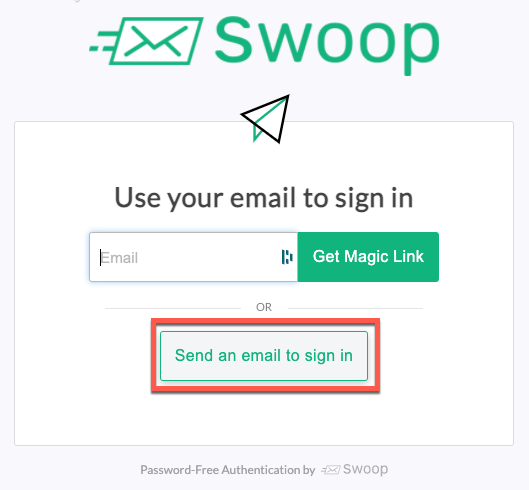
Send an email to login
At this point, instead of triggering a mailto link, Swoop will present an instructional walk-through of the steps needed to send an email to login.
Step 1: Copy our email address
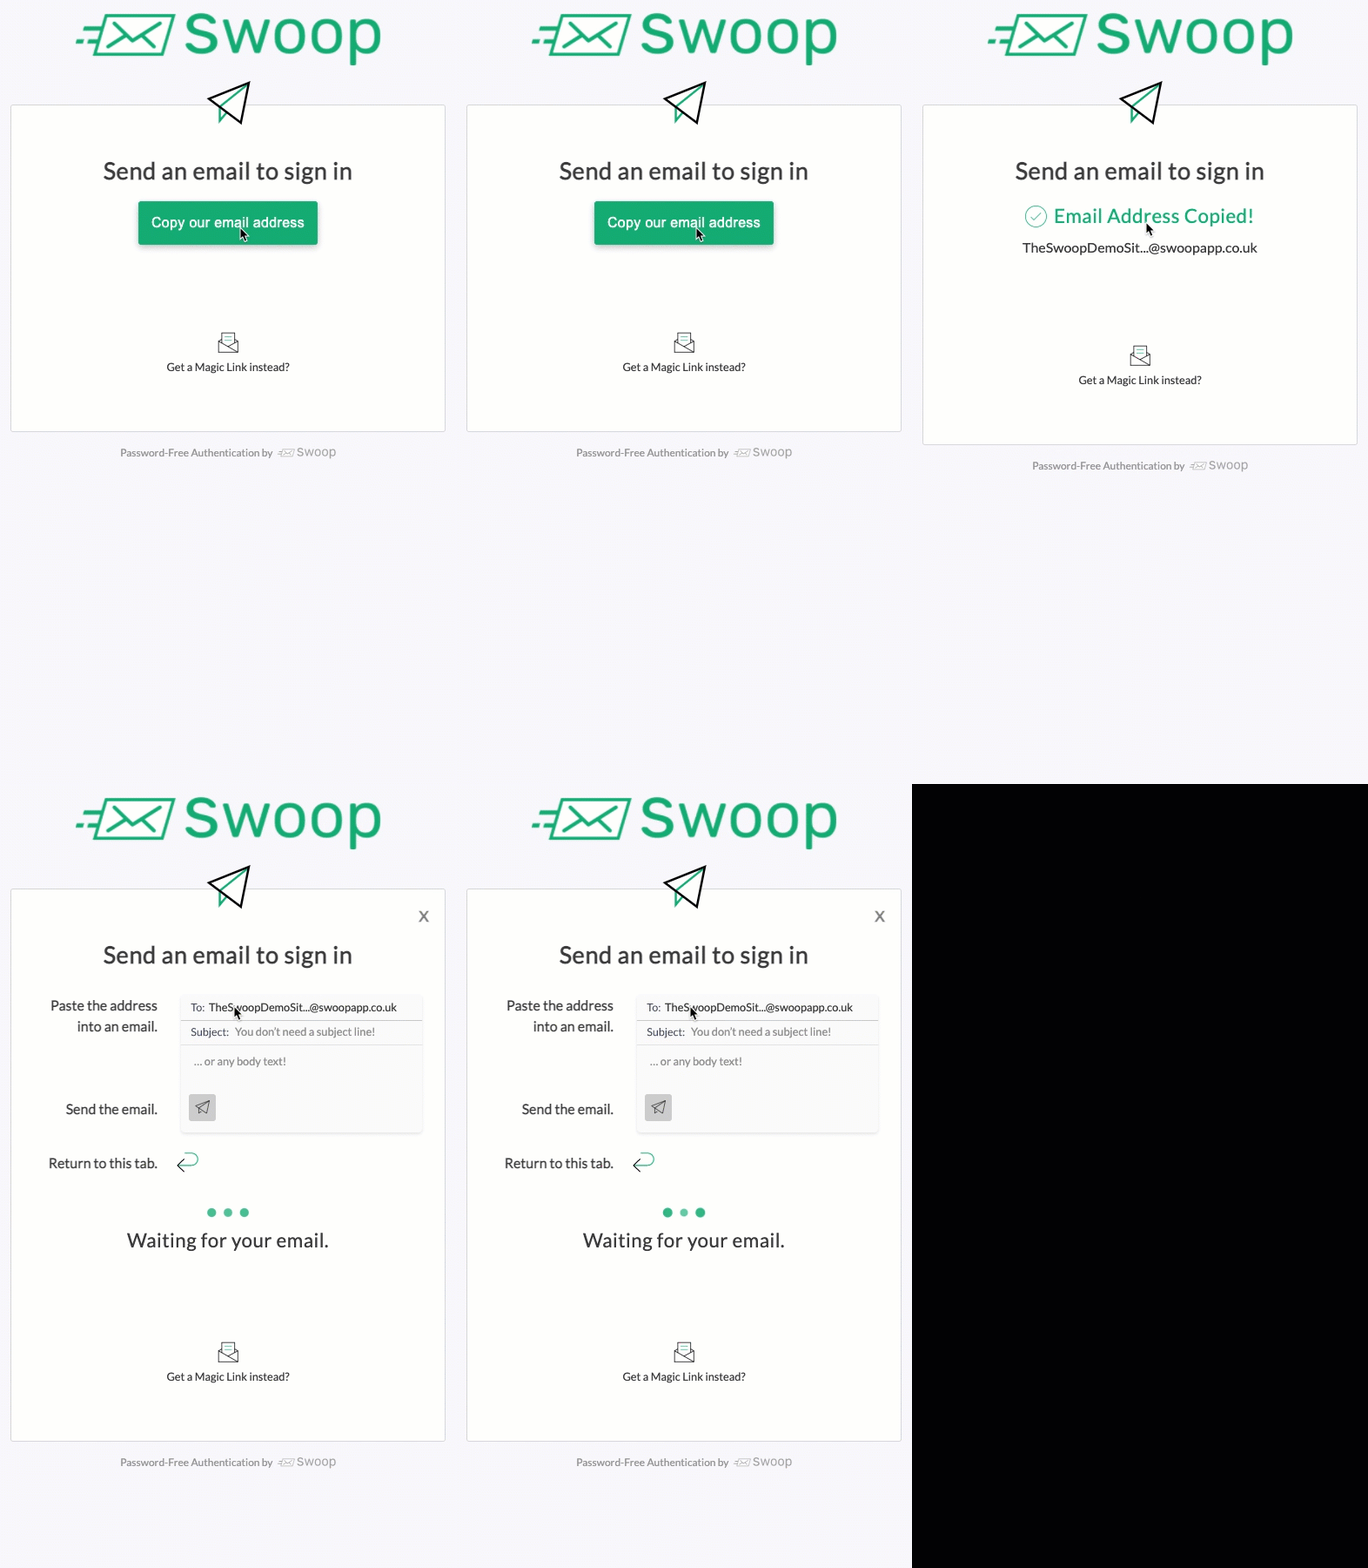
Step 2: Paste the address into an email.
Step 3: Send the email
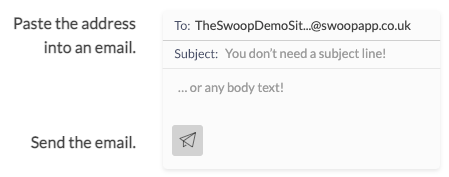
Step 4: Return to the original browser tab.
There's no need to type. Users simply copy, paste, send and return to the original browser tab.
After this initial authentication, users will be able to use the 1-Click Connect for subsequent visits.
Updated almost 5 years ago
