Wordpress
Swoop's WP plugin is the easiest way to add password-free authentication to your WordPress site. Try it right now and see for yourself!
Adding the Swoop service to any Wordpress site is dead-simple with Swoop's WordPress plugin. Instead of custom-coding Swoop within a WordPress site, let our Swoop plugin do the heavy lifting. Follow these steps and you'll be on your way to eliminating passwords on your WordPress site in a flash.
Step 1: Install & activate Swoop plugin
- Log into your WordPress admin typically found at: www.yourdomain.com/wp-admin.
The Last Time You'll Need Your Password
This should be the last time you need that pesky WordPress admin password. Once you're done installing and configuring the Swoop plugin, you'll be password-free moving forward.
- On the left-hand navigation, click on 'Plugins'
- Next, click on 'Add New'
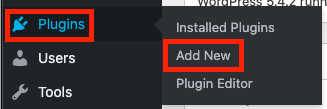
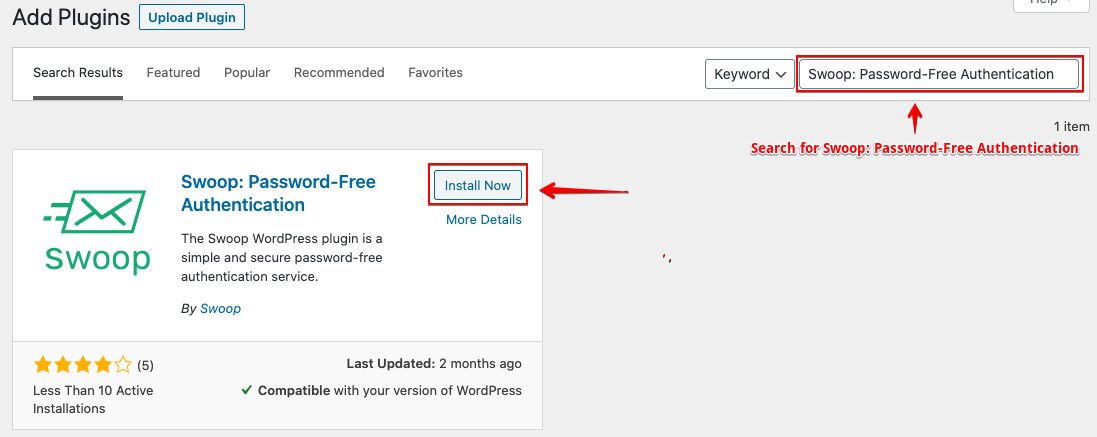
- Search for: 'Swoop: Password-Free Authentication' in the search bar.
- Click 'Install Now'
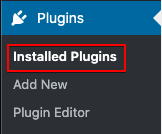
- Navigate to 'Installed Plugins'
- Activate 'Swoop: Password-Free Authentication'.

- Click on the Swoop Settings Page to take a shortcut to Step 2.

Step 2: Connect Swoop to your WordPress site
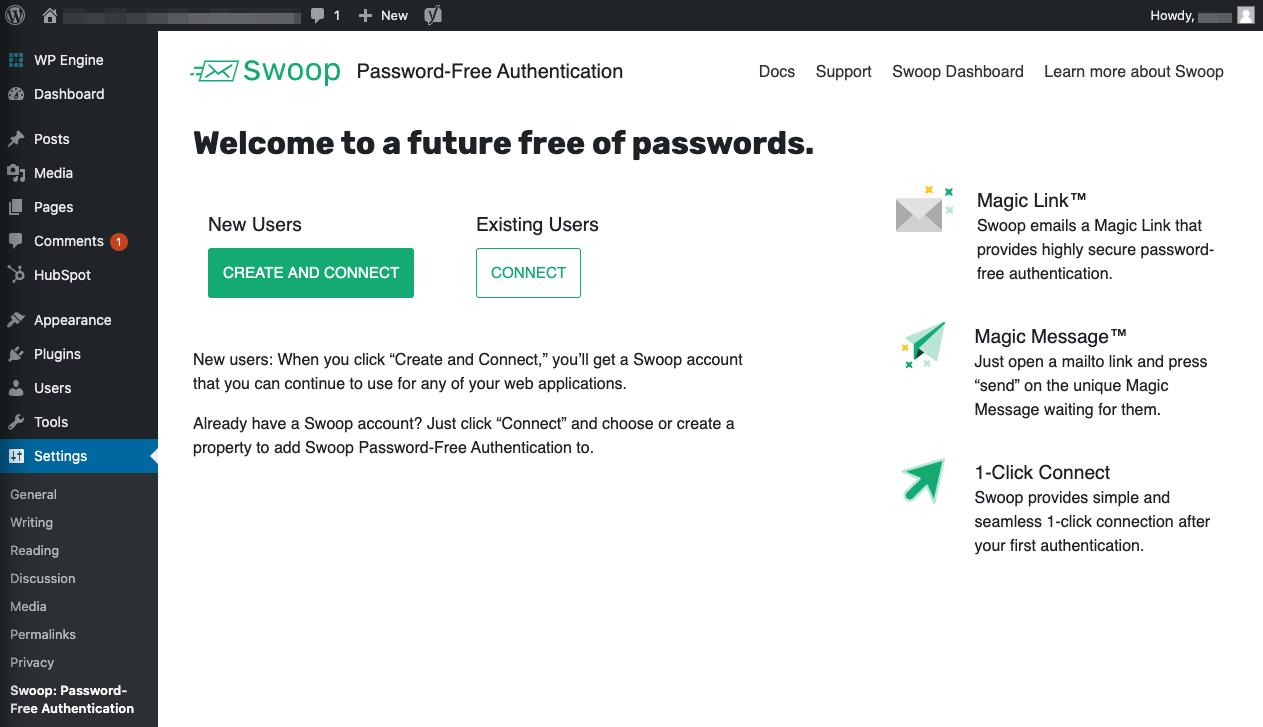
Once the Swoop plugin is installed and activated, you'll be ready to take advantage of Swoop Connect, which quickly and easily creates/connects your Swoop account to your WordPress site. Let's begin.
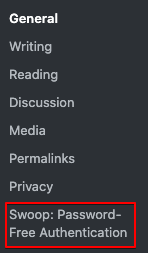
- Navigate to Settings > Swoop: Password-Free Authentication

- New users should click 'CREATE AND CONNECT'
Existing Users
For users with an existing Swoop account, click 'Connect' underneath the Existing User header. From there you'll be presented with the ability to Swoop into your Swoop dashboard account. You can decide if you want to connect to an existing org > property or create a new property.
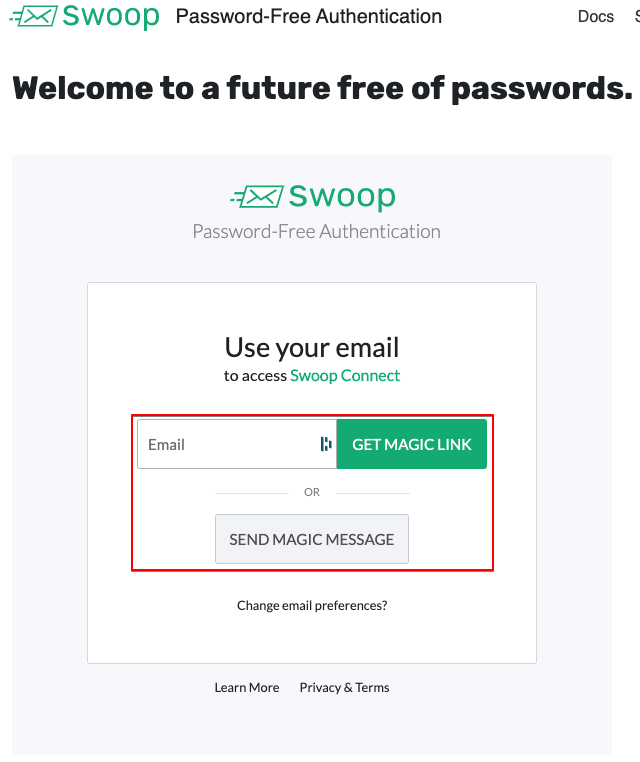
- Next, you'll see the Swoop authentication service embedded within the connection flow. Follow the steps to authenticate with either 'Get Magic Link' or 'Send Magic Message'.
- Click 'CONNECT TO SWOOP PASSWORD-FREE AUTHENTICATION'
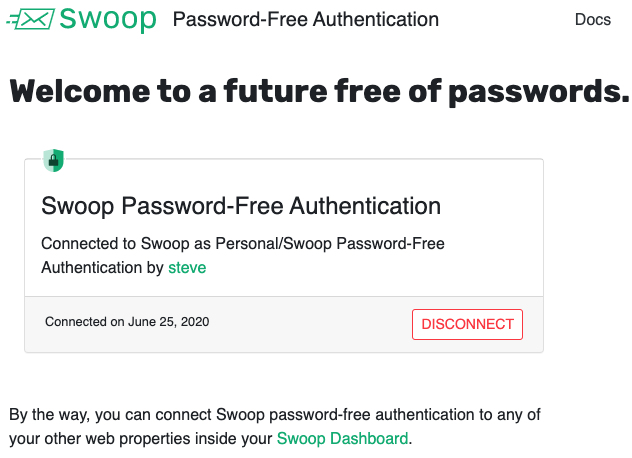
That's it. You're done.
And so are passwords on your WP site.
The next time you log in to your WordPress site, the default WP username/password will be replaced with the 'Swoop In with Email' icon.
Step 3: Add Login Button Shortcode
Now that you have hooked up Swoop to your WordPress instance you can now add a login button with the use of our shortcode.
- Login With Email Button = [swoop_login]
There are also a couple of customizable parameters that can be set to control aspects of the button.
- Customize button label = [swoop_login title="xxxxx xxxxx xx"]
- Customize target upon success authentication = [swoop_login target="https://yoururl.com/goherenow"]
You can also combine both title and target within the same shortcode.
Step 4: Add Register Button Shortcode
Next, you can add a basic registration form and button to your WordPress instance with the following shortcode.
- Basic registration form= [swoop_register]
Try the customizable parameter that can be set to control aspects of the button.
- Customize target upon success authentication = [swoop_register target="https://yoururl.com/goherenow"]
Updated almost 5 years ago
